Autumn Leaves
All summer the green chlorophyll in leaves is busy using sunlight to combine water and minerals from the soil with carbon dioxide from the air to make a type of sugar on which plants fee. This process is called photosynthesis (foto-SIN-th-sis). When autumn days begin to shorten, these little plant food factories shut down and a strange thing happens. The leaves change from green to shades of red, orange, and yellow. Soon the whole countryside wears a blanket of color. Sumacs, maples, dogwoods, sassafras, and some oaks turn shades of pink, red, and maroon, while sycamores, hickories, poplars, sweet-gums, and catalpas turn gold, yellow, and orange.
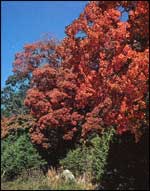
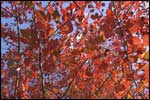
Surrounding evergreens cause these red, orange, and yellow maple leaves to look even more spectacular.
We take these fall colors for granted, but did you know that many people throughout the world never see the leaves change? They miss this spectacular sight because autumn coloration occurs only in the three temperate, deciduous forests. (Deciduous comes from the Latin word meaning “to fall off” and is the name given to trees that shed their leaves in the fall.) One deciduous forest includes western Europe and the British Isles; the second, eastern China and parts of Japan; and the third, the eastern section of North America. Only a few small regions in the southern hemisphere have trees that display autumn colors—southern Chile, Tasmania, and New Zealand.
Have you ever wondered how the leaves manage to turn these beautiful autumn shades? Small children often are told that Jack Frost paints them, but to learn the real process, we must go back to the green leaves of summer. You already know that the green color comes from chlorophyll, but did you know that the plant cells also contain tiny grains of yellow and red-orange plant pigments called carotenoids (ka-ROT-n0oids)? The yellow pigment, also found in egg yolks, is called xanthophylls (ZANTH-o-fill), and the red-orange pigment, which gives carrots their orange coloration, is known as carotene (CARE-o-teen). Because these pigments are quite small, their color is hidden by the bright chlorophyll green during the summer.
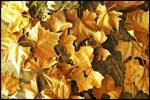
When the days begin to shorten in the fall, the decreased periods of light cause changes to take place within the trees, and they start getting ready for the coming winter. The chlorophyll, which is no longer needed to manufacture food for the plant, begins to break down and lose its color. As the green fades, the colored grains of xanthophylls and carotene are allowed to show, and the leaves turn yellow or red-orange, producing the most common autumn colors.
Other pigments called anthocyanins
(an-thro-CY-a-nins) are
responsible for the bright
reds, maroons, purples,
and blues. Anthocyanins
are not found in the leaves
during the summer as are
the carotenoids, but are
formed during the autumn.
One of the ways the tree
readies itself for winter
is by forming a separation
layer of cells between the
leaf and the limb. This
layer of corky cells seals
the tree and isolates each
leaf. Once this happens,
the sugar manufactured in
the leaf can no longer pass
over into the tree. It must
remain in the leaf. As the
sugar builds up, sunlight
causes anthocyanins to be
formed, and the leaf containing
the greatest amount of sugar
turns the brightest red.
Differences in the soil
affect the colors of the
anthocyanins. An acid soil
causes the tree sap in which
the anthocyanins form to
be acid and produces the
bright reds, but an alkaline
soil will produce the purples
and blues.
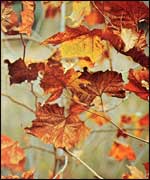
These sycamore leaves are dying and turning brown, but you can still see the fading chlorophyll and the exposed yellow carotenoid, called xanthophyll, in some of them.
Combinations of xanthophyll, carotene, and anthocyanins are responsible for all the various shades except brown. Brown can be produced by a substance called tannin, which is a bitter, waste product of the tree; however, the brown coloration is usually a sign of dead cells. As the color pigments disintegrate and the leaf dies, it turns brown. In fact, an early, hard freeze can kill the leaves before any color develops. When this happens, the leaves turn from green to brown, allowing no yellow, orange, or red to form. Dry, cool autumn days with plenty of sunlight and cool nights without severe frost produce the most brilliantly colored leaves.
In all too short a time
the autumn colors fade and
the leaves fall to the ground,
but while they are still
bright with color, you can
collect and preserve a few
of them. Once the leaves
are properly dried, the
colors will last two or
three years. One way to
dry the leaves is to place
them between two pieces
of blotting paper or several
layers of newspaper, making
sure the leaves remain flat.
Then place the blotting
paper or newspapers between
cardboard. Tie the package
securely with string and
place a heavy object on
top to press the leaves.
They also can be pressed
by adding a piece of plywood
to each side of the package
and attaching clamps to
compress it. In a couple
of weeks or so the moisture
should be removed from the
leaf and you will have a
dried specimen for your
collection.
Another way to dry leaves involves the use of clean, dry sand. Sift a half-inch-deep layer of sand into a container of some type. Place the leaves on top of the sand, making sure they do not touch or overlap, and then sift enough sand on top to cover them completely. Another layer of leaves can then be added along with another covering of sand. The sand will cause the water to evaporate from the leaf cells and will press the leav in a natural position. Allow two weeks’ dryhing time. To speed the drying process, warm the sand in the oven before you use it on the leaves.
A similar, but more expensive,
method, uses silica gel
instead of sand for the
drying agent. It dries faster
than sand, and your leaves
should be ready in less
than a week. As with the
sand, put a layer of silica
gel in a container, place
the leaves o top, and cover
them with more silica gel.
The only difference in the
process is that sand drying
may be done in an open container
and silica gel drying must
be done in an airtight container.
Silica gel may be purchased
in most hobby and art craft
stores and costs about five
dollars a pound.
If you do not wish to spend time drying your specimens, they may be preserved by dipping them into melted paraffin. (Paraffin can burst into flame if overheated, so it should be melted in a double boiler.) A quick dip is all that is necessary to thinly coat the leaves with wax. A thick layer of wax will dull the colors. Since melted paraffin is extremely hot and can result in burns if you are not careful, you might prefer to place each leaf between pieces of waxed paper and press them with a medium hot iron. Fresh pieces of waxed paper will be required for each leaf because the iron melts the wax on the paper and transfers it to the leaf.
After the leaves have been dried or waxed, they are ready to identify and mount in a scrapbook. The book Field Guide to Trees and Shrubs by Roger Tory Peterson or the Golden Field Guide Trees of North America by Brockman, Zim, and Merrilees should prove helpful in identifying your specimens. These books should be available at your local library.
A simple way to mount your leaves is to glue them directly to the paper. One of the milk-base glues, such as Elmer’s Glue-All, is best for this purpose. The clear plastic wrap your mother uses in the kitchen can then be taped over the leaves to protect them. If you do not want to glue your leaves to the paper, put each leaf in an envelope made from the clear plastic wrap. The envelopes can then be taped in the book with no damage to the leaves themselves.
Collecting autumn leaves can be a pleasurable pastime for you this fall, and your schoolteacher will be delighted to see your “Book of Autumn Leaves” when it is finished.
Ilo
Hiller
1983 Autumn Leaves. Young
Naturalist. The Louise
Lindsey Merrick Texas Environment
Series, No. 6, pp. 79-81.
Texas A&M University
Press, College Station.